
Installing the HAKOM TSM App
Preparation
Make sure you have already prepared at least one database before starting the installation process. Guides for setting up a database can be found here: Installing the HAKOM TSM Database
Copy the installation package to a local folder. To install the HAKOM TSM App, run the Setup executable under \Setup and follow the steps of the installation client. The storage path can be adjusted. By default a HAKOM directory is created.
Before installation check if the files HAKOM.Config, HAKOM.License and any organization-specific EvalComponents are stored in the setup folder \Setup. After the installation has been completed these files will be pasted in the installation folder HAKOM\TSM 3.9\bin.
Adding the Add-in to Microsoft Excel
The TSM App is automatically added to Microsoft Excel for the user executing the installation. All other users need to add the add-in to Microsoft Excel manually via one of the options listed below.
The ribbon is activated via an add-in information file that is loaded from the \bin directory in the TSM installation folder.
There are two files, one for the 64bit and one for the 32bit version of Excel. Depending on which version of Excel is used, the corresponding file should be selected.
HAKOM.TSM_64Bit.xll
HAKOM.TSM_32Bit.xll
Add the Add-in via Windows Start Menu
In the Windows start menu there is a dedicated setup executable to add the add-in to Microsoft Excel:
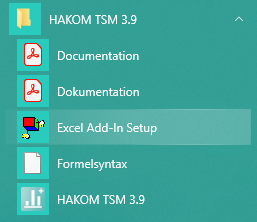
Executing the "Excel Add-In Setup" will add the add-in to Microsoft Excel for the user executing the setup.
Add the Add-in via Microsoft Excel Options
To add the HAKOM TSM Excel Add-in to your Excel, please follow these steps:
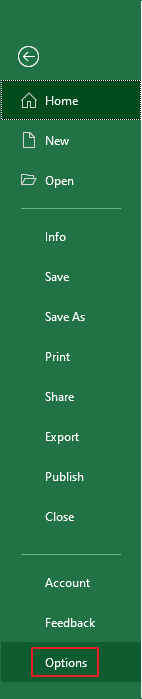
Open Excel and switch to the file tab in the ribbon bar and open the "Options" window.
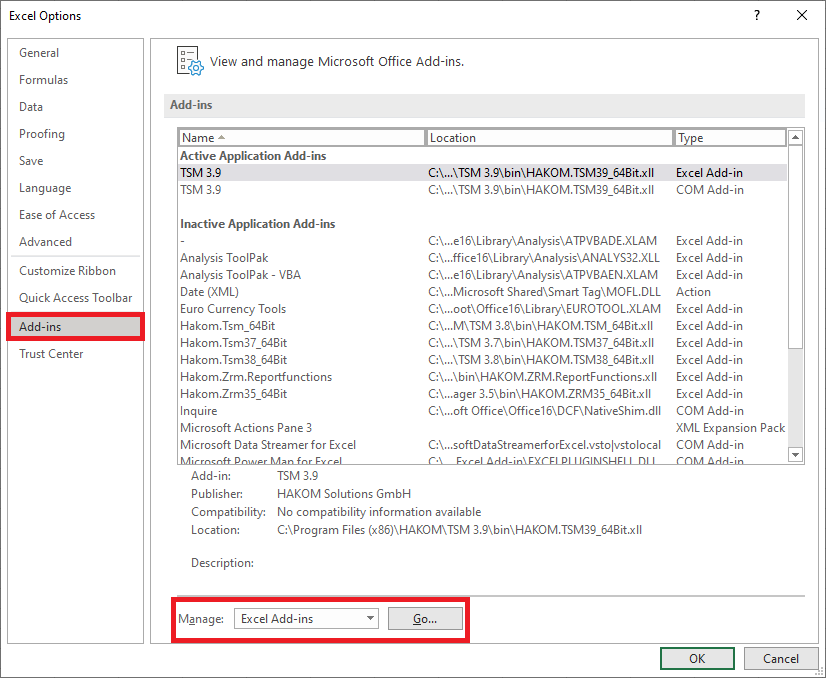
Select "Add-Ins" on the left in the Excel Options window and then "Go to" in "Manage - Excel Add-Ins".
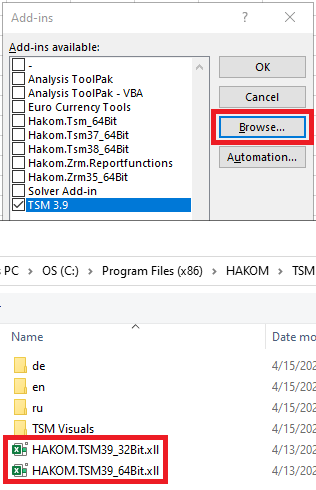
On the add-ins page select the button "Browse" and then in the file selection dialog select the file HAKOM.TSM_64Bit.xll or HAKOM.TSM_32Bit.xll corresponding to the Excel version.
The files are located in the \bin directory of the TSM installation.
Confirm with "OK".
Back in the "Add-Ins" window, activate the checkbox for TSM and confirm with "OK".
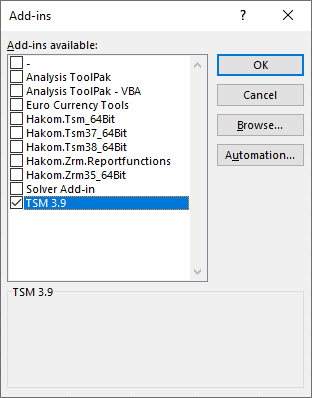
The tab "TSM" is now visible in the Excel ribbons menu.

Add the Add-in via Script
The provided script bin\XllAddinSetup.vbs can be used to automatically add the add-in for example as a start up script. This installation method is ideal for system administrators or automation.
This script supports the following parameters:
Order | Description | Values |
|---|---|---|
1. | Controls whether the add-in should be installed or uninstalled | /I - install the add-in /U - uninstall the add-in |
2. | Controls whether a message box should be displayed | 0 - message box will be displayed 1 - message box will not be displayed |
Example
cscript bin\XllAddinSetup.vbs /I 0Use TSM+ without Microsoft Excel
The use of Microsoft Office Excel is not mandatory for installing TSM 3.9. It is possible to use TSMPlus.exe from the installation directory with all features outside of Microsoft Excel.
If you selected this option during installation process you will find an icon on your desktop:

Milliseconds Support
To activate time series with intervals less than one second, the setting InternalTimeUnit must be added or adjusted
For more information, refer to Operators - Configuration
1 |
|
possible values:
0 (default), seconds, beginn: 1972-01-01T00:00:00+01:00
1 seconds, beginn: 1970-01-01T00:00:00Z
2 milliseconds, beginn 1970-01-01T00:00:00Z
If the configuration does not contain this tag, the default value 0 will be used.