
WebTSM Services API
Installation of the WebTSM Services is fairly easy and does not require any executable setup to be run.
Make sure you have already prepared at least one database before starting the installation process. Guides for setting up a database can be found here: Installing a TSM Database
Getting the Files
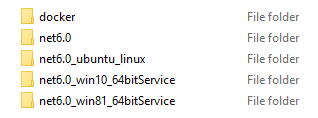
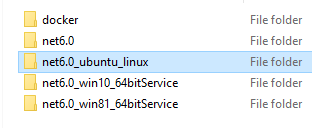
You should have received - either as part of a full HAKOM Framework delivery, or in a separate file, the following folder structure:
Which Files to Use
There are several ways to run the WebTSM services. Depending on the desired way, you must proceed as follows:
Running the WebTSM Services with .NET Framework 6 already installed
Copy the folder "net6" and got to the section: Installation on WindowsRunning the WebTSM Services on Windows 10 64bit / Windows Server 2016 OR on Windows 8.1 64bit / Windows Server 2012 without .NET Framework 6 already installed
Copy the folder "net6_win10_64bitService" or "net6_win81_64bitService", depending on your operating system and go to the section: Installation on Windows..Running the WebTSM Services on Azure
Copy the folder "net6" and go to the section Deploying to Azure.
Running the WebTSM Services on Ubuntu Linux
Copy the folder "net6_ubuntu_linux" and go to the section Installation on Linux.
Installation on Windows
There are two ways to run the WebTSM Services under .NET Framework 6:
Running the WebTSM Services Under .NET Framework 6 from the Command Line
Open a command line window and change the directory of the folder which you copied according to the section Which files to use.
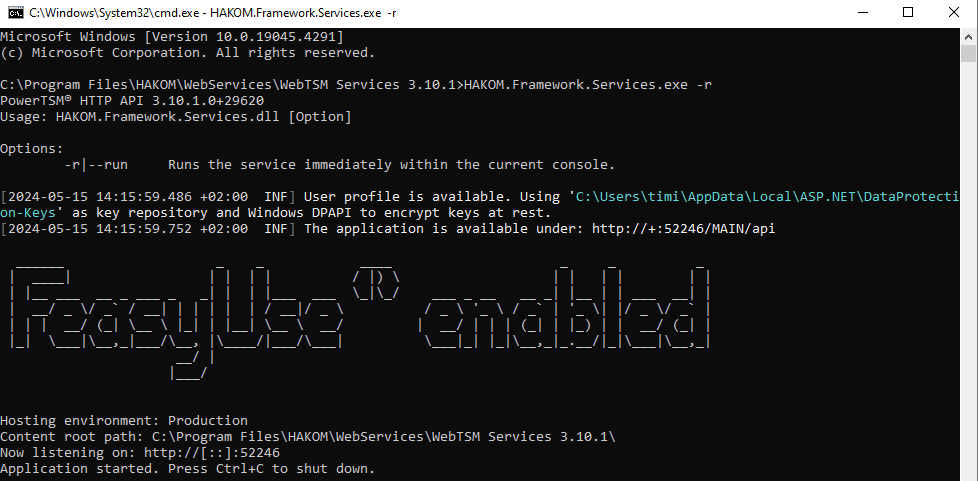
Run the executable HAKOM.Framework.Services.exe with the command line argument "-run".

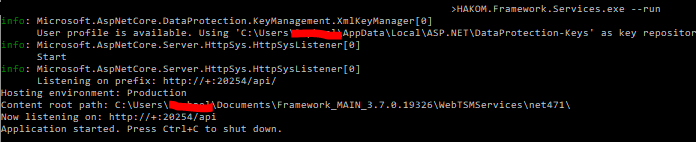
If everything is configured correctly, the output should look similar to this:
Open a browser and navigate to the root address of the service

You should be greeted by some version info. The request from the browser should also have been logged in the console:

Running the WebTSM Services as a Windows Service
If you have made sure that the web service is working and configured correctly, you can create a Windows service.
If you've installed the service before, you may have to uninstall and reinstall it
Creating, Starting and Deleting a Windows Service Using the Service Console Utility
Open a command line window with administrative privileges and use the following commands to get the associated action:
Action | Command |
|---|---|
Create a service | sc create "Name_of_service" binPath= "Absolute_path_to_services.exe" Note the space between "binPath=" and the actual path! |
Start a service | sc start "Name_of_service" |
Stop a service | sc stop "Name_of_service" |
Delete a service | sc delete "Name_of_service" Deleting running services may cause unintended effects, possibly even requiring manipulation of registry keys to repair. So make sure to always stop the service before attempting to delete it! |
Windows Services Status:
Type sc interrogate service_name (where service_name is the name of the service) in the command prompt to update the status of that service in Service Control Manager.
Type sc qc service_name in the command prompt to display the configuration status of the service.
Type sc queryex service_name in the command prompt to display the extended status of the service. This command will provide the following information about a service:
SERVICE_NAME (the service's registry subkey name)
TYPE (the type of service, for example, shared process, interactive)
STATE (for example, running, paused, and the states that are not available)
WIN32_EXIT_CODE (the Windows exit error code)
If the service was started successfully, this field should contain a zero (0). If the service failed to start when an attempt was made, this field should contain an exit code.SERVICE_EXIT_CODE (the service exit code)
CHECKPOINT
WAIT_HINT (the time period the SCM waits before reporting a service failure)
PID (ID of the process running the service)
FLAGS
Type net helpmsg exit_code (where exit_code is the 4 digit number of the error code) in the command prompt to display the meaning of the exit code.
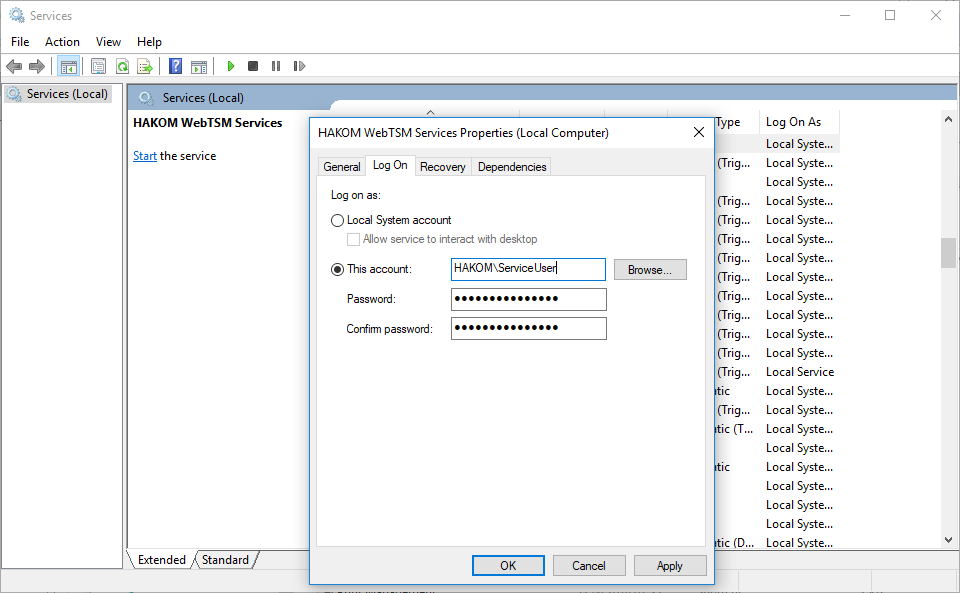
Depending on your environment, you may have to modify the user under which the service is run. To do so, open the Windows Services management application and right click on the service. Under "Properties" the correct user can be set.
Deploying to Azure
Within the net6 folder, adjust the configuration files to meet your requirements.
Put all contents from the net6 folder in a zip file.
Go to your http://portal.azure.com and sign in.

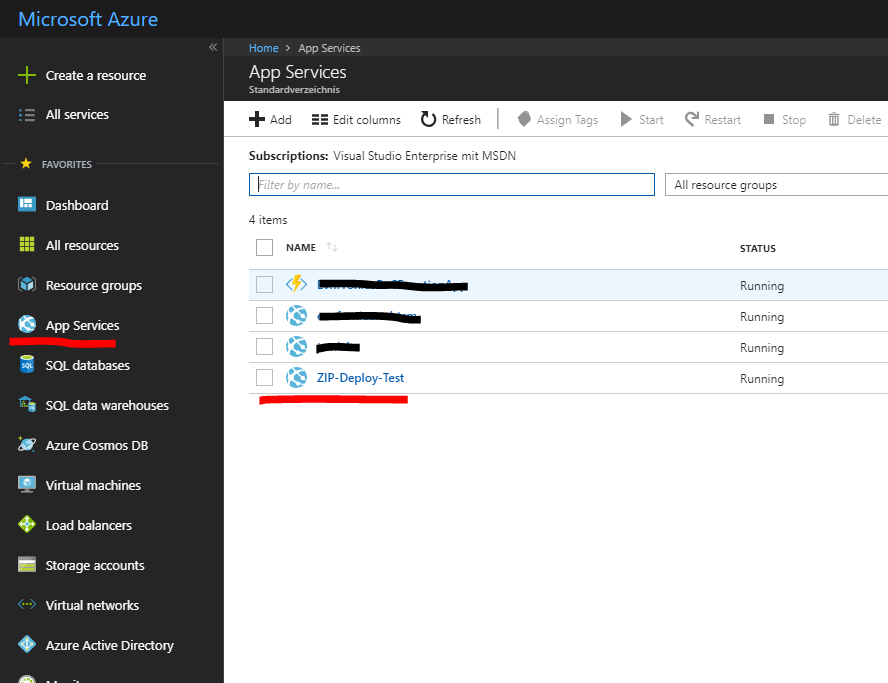
From the left-hand menu, choose "App Service", then click on the Web App where you would like to deploy the services.
If you do not have an Azure Web App yet, please follow the guide here: https://docs.microsoft.com/en-us/azure/app-service/app-service-web-get-started-dotnet
In the navigation menu on the left side select "Advanced Tools" and click "Go":

A new page will be opened, allowing for access to the "Advanced Tools" options.
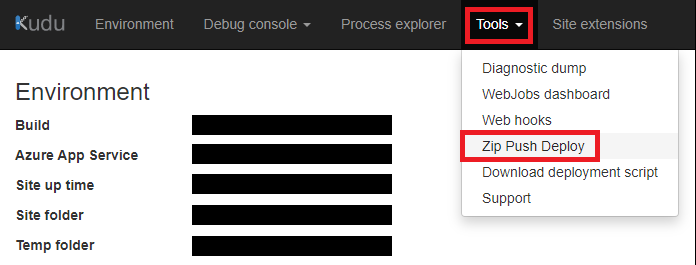
Use the menu bar to open the Zip Push Deploy Tool:
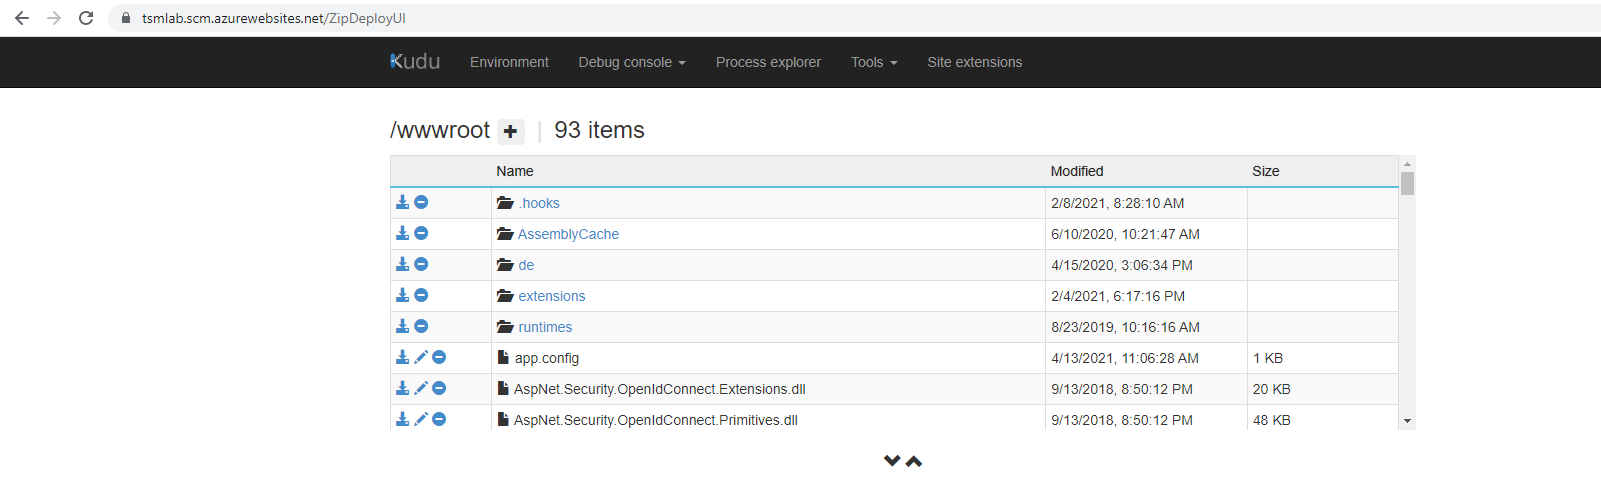
This will open an overview of the deployed folders and files:
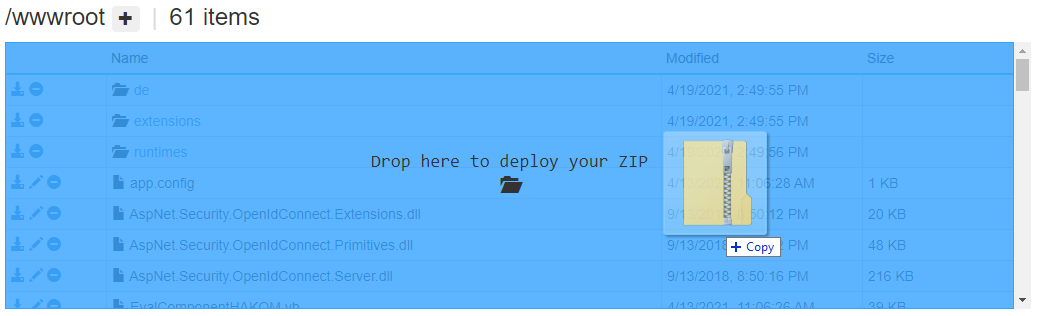
Drag & Drop the Zip file into the browser:
Deployment should start immediately, and you should be able to access the service via the WebApps URL.

Troubleshooting
Access Denied Errors When Trying to Start the Service

This usually means that the application is not allowed access to the port you're trying to listen on. There are two ways to fix this:
Run the application as administrator
By running the command line window with elevated privileges you may get around this error.This is not a good idea. For many reasons.
Add a rule that allows you to host the service under the port/address you would like to.
Start a command line window with administrative privileges
Check whether there's already a registration for the address you want to use. If there is, you will have to use another one in HAKOM.Config
CODEnetsh http show urlacl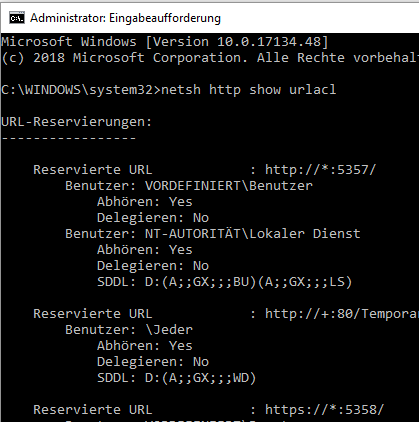
If there is not, add one:
CODEnetsh http add urlacl http://+:20254/api User=Jeder
The address (http://+:20254/api) must match exactly what you've specified in the HAKOM.Config under the <URLs> section. User is "Everyone" on english operating systems, "Jeder" on german windows installations (this name may vary in other languages as well).Replace "Jeder" with "Everyone" on english Windows systems
You should get a message telling you that adding the URL-Reservation was successful.
Try again. The service should run as expected now:
Connection Refused When Trying to Run Using SSL
If the service is starting without a problem, but you get errors such as "Connection Refused" or "Connection Reset" when accessing it, it may be because you're trying to host the service under SSL (HTTPS) without having a proper certificate installed.
In this case, go through the steps to install and configure your certificate again and make sure everything is set up correctly
Installation on Linux
Currently, Ubuntu Linux (16.04 or later) is supported and compiled binaries can be provided:
Getting the files
The binaries can be found in the shipped .zip-archive:
Requirements/Prerequisites
Up-to-date installation and proper configuration of IANA Timezone Database (tzdb)
Setting up the IANA Timezone Database
On most systems, this is not necessary as this will already be installed and regularly updated. Some docker-images however do not include this, which means that time zones will not work properly with most of the zones missing entirely.
Ubuntu Linux
apt-get install --reinstall tzdataInstalling and Running the Service
Simply copy the files onto your system and run:
dotnet HAKOM.Framework.Services.dll --runRunning the Service as a Daemon under Linux
The simplest method of daemonizing the service to
run as a background process
automatically start on reboot
etc.
is to use an init-script for the systemd service manager.
Currently, we do not provide such a script with our distribution but may include it if there is demand for it
Dockerized Deployment
As of version 3.8.5, installation files include docker images of the WebTSM Service for you to use.
These are found as tarball archives in the installation files under:
WebTSMServices/dockerInstallation
Prerequisites
You must have
A HAKOM.Config file with the WebTSMServices section configured to your needs
A HAKOM.License file valid for your installation
Within the container, the WebTSM Services are expected to be configured for port 80. Make sure to not configure a different port in the <Hosting> section of the HAKOM.Config.
Steps
The following instructions assume commands being run using Windows. When specifying paths, keep in mind that linux uses forward slashes instead of backward slashes as a folder separator.
Load the image using
docker load --input "WebTSMServices_3.9.0.tar"Create the container and mount the configuration and license file inside it:
docker create --name <name you want the container to have> -p <portExtern>:80 --dns <ip address of local DNS server, only required under windows> --mount "type=bind,source=<absolute path to HAKOM.Config>,destination=/app/HAKOM.Config" --mount "type=bind,source=<absolute path to HAKOM.License>,destination=/app/HAKOM.License" webtsmservices:<version tag>Start the container using
docker start <name you gave the container or its id>Modifying the Configuration
When making changes to the HAKOM.Config file, you need to restart the container using
docker stop <name you gave the container or its id>docker start <name you gave the container or its id>Debugging
The log file of the WebTSM Services instance can be accessed from the host using the following command
(docker exec -t <name you gave the container or its id> cat HAKOM.Framework.Services.log) > test.logDockerized Deployment and Time Zones
Please note that when hosting the WebTSM Services as a docker image, the service will run in Vienna local time. This might have consequences if a client application runs in a different time zone. For more information and ways to avoid problems resulting from different time zones between host and client please consult WebTSM Services API Timestamp Formatting.
Health Check
Docker provides an option to execute health checks for a deployed service. For more information please refer to the dedicated section of our documentation: Health Checks
Configuration
For more information regarding configuration, please refer to: Operators Guide - Configuration